
9. Building a WebService Test Plan
In this section, you will learn how to create a Test Plan to test a WebService. You will create five users that send requests to One page. Also, you will tell the users to run their tests twice. So, the total number of requests is (5 users) x (1 requests) x (repeat 2 times) = 10 HTTP requests. To construct the Test Plan, you will use the following elements: Thread Group, HTTP Request, and Aggregate Graph.
If the sampler appears to be getting an error from the webservice, double check the SOAP message and make sure the format is correct. In particular, make sure the xmlns attributes are exactly the same as the WSDL. If the xml namespace is different, the webservice will likely return an error.
9.1 Creating WebService Test Plan
In our Test Plan, we will use a .NET webservice. We won't go into the details of writing a webservice. If you don't know how to write a webservice, google for webservice and familiarize yourself with writing webservices for Java and .NET. It should be noted there is a significant difference between how .NET and Java implement webservices. The topic is too broad to cover in the user manual. Please refer to other sources to get a better idea of the differences.
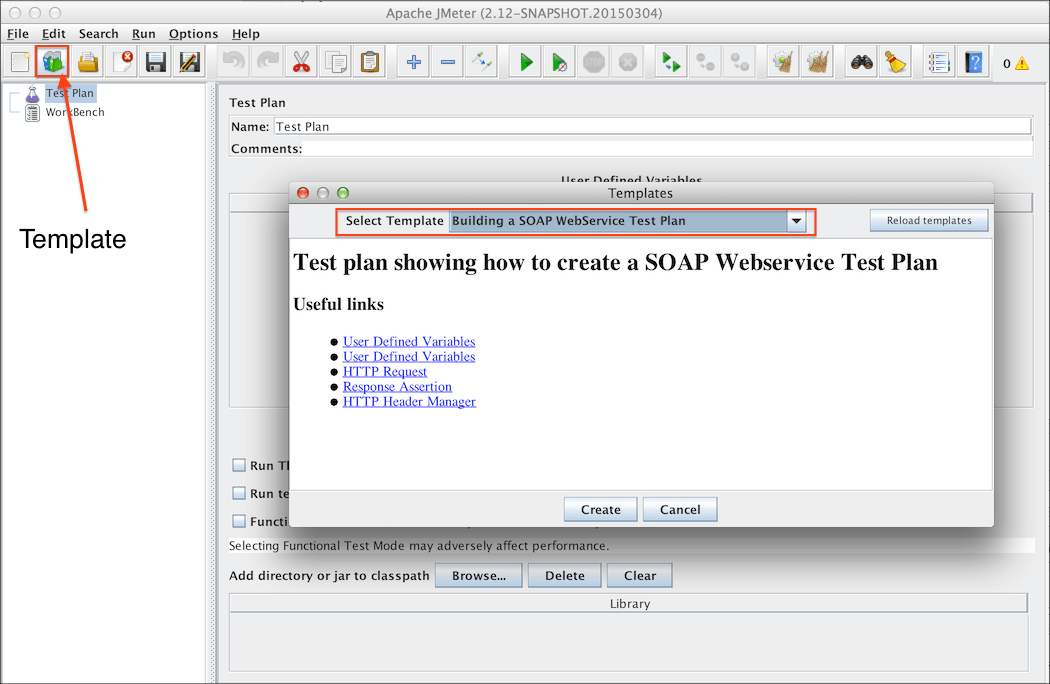
Start by using menu
and select template "Building a SOAP Webservice Test Plan".
Then, click "Create" button.
- In "HTTP Request Defaults" change "Server Name of IP"
-
In "Soap Request", change "Path:"
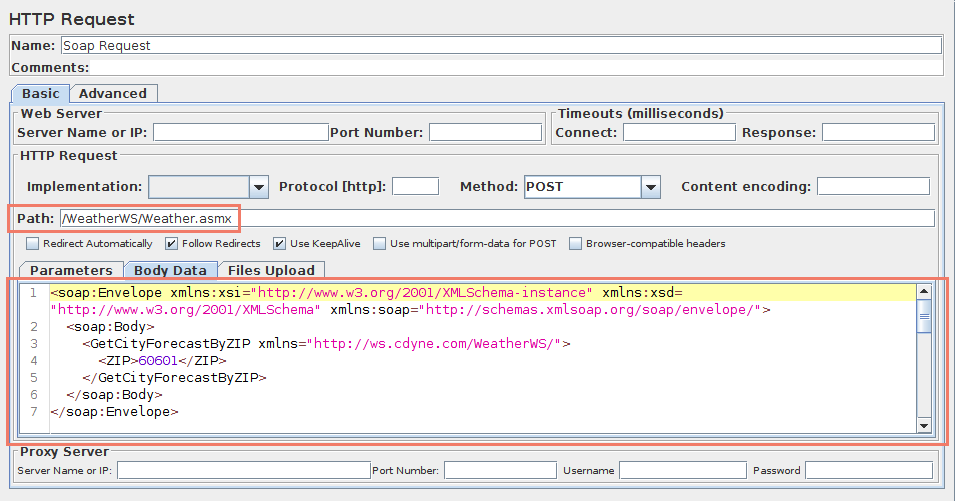
Figure 9.1.1 Webservice Path
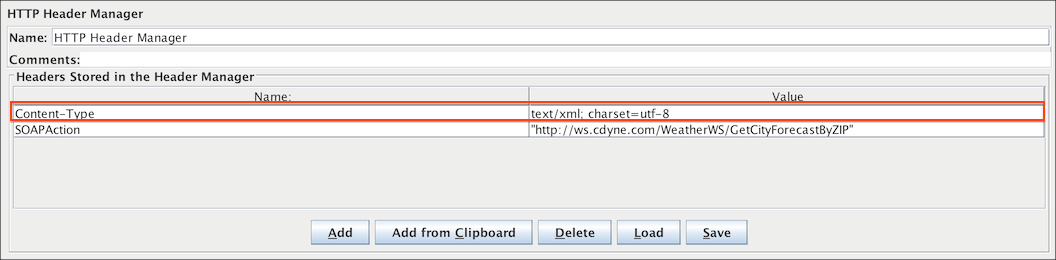
Next, select "HTTP Header Manager" and update "SOAPAction" header to match your webservice.
Some webservices may not use SOAPAction in this case remove it.
Currently, only .NET uses SOAPAction, so it is normal to have a blank SOAPAction for all other webservices. The list includes JWSDP, Weblogic, Axis, The Mind Electric Glue, and gSoap.
The last step is to paste the SOAP message in the "Body Data" text area.
9.2 Adding Users
The Thread Group tells JMeter the number of users you want to simulate, how often the users should send requests, and the how many requests they should send.
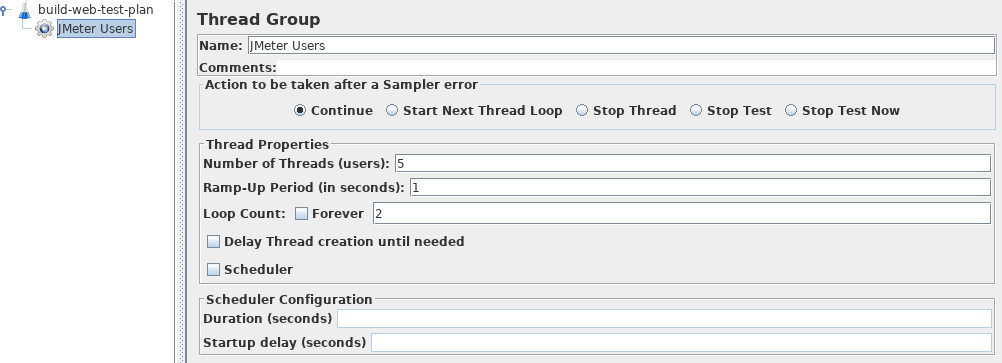
Select the Thread Group element in the tree, if you have not already selected it. You should now see the Thread Group Control Panel in the right section of the JMeter window (see Figure 9.2 below)
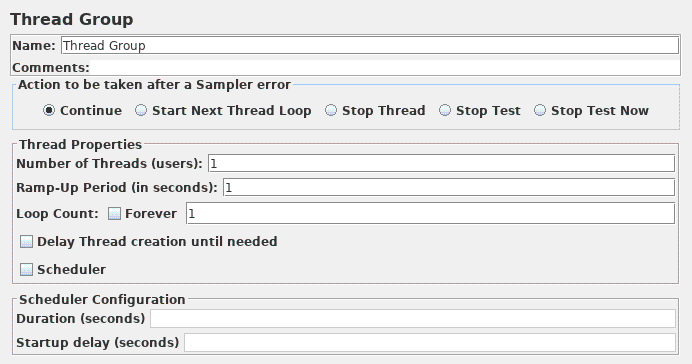
Start by providing a more descriptive name for our Thread Group. In the name field, enter JMeter Users.
Next, increase the number of users (called threads) to 10.
In the next field, the Ramp-Up Period, leave the default value of 0 seconds. This property tells JMeter how long to delay between starting each user. For example, if you enter a Ramp-Up Period of 5 seconds, JMeter will finish starting all of your users by the end of the 5 seconds. So, if we have 5 users and a 5 second Ramp-Up Period, then the delay between starting users would be 1 second (5 users / 5 seconds = 1 user per second). If you set the value to 0, then JMeter will immediately start all of your users.
Finally, clear the checkbox labeled "Forever", and enter a value of 2 in the Loop Count field. This property tells JMeter how many times to repeat your test. If you enter a loop count value of 0, then JMeter will run your test only once. To have JMeter repeatedly run your Test Plan, select the Forever checkbox.
See Figure 9.2 for the completed JMeter Users Thread Group.
9.3 Adding a Listener to View Store the Test Results
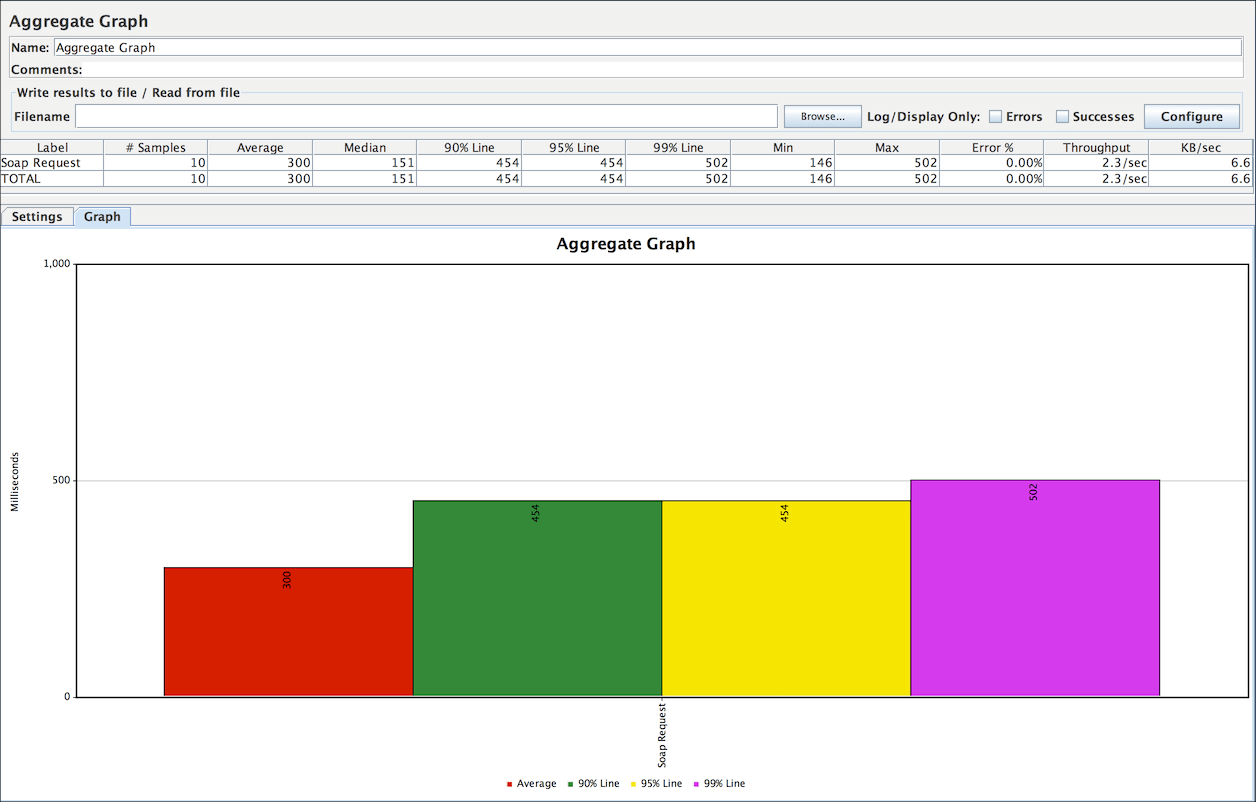
The final element you need to add to your Test Plan is a Listener. This element is responsible for storing all of the results of your HTTP requests in a file and presenting a visual model of the data.
Select the JMeter Users element and add a Aggregate Graph listener (). Next, you need to specify a directory and filename of the output file. You can either type it into the filename field, or select the Browse button and browse to a directory and then enter a filename.
9.4 Rest Webservice
Testing a REST Webservice is very similar as you only need to modify in HTTP Request
- Method: to select the one you want to test
- Body Data: which can be JSON, XML or any custom text