7. Building an FTP Test Plan
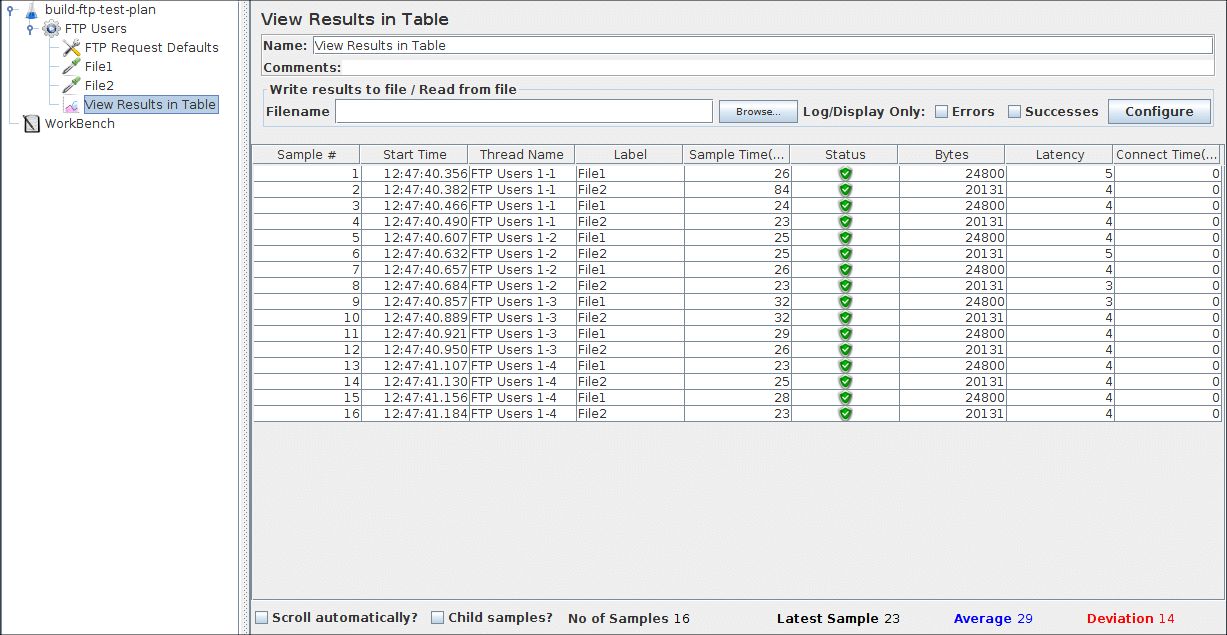
In this section, you will learn how to create a basic Test Plan to test an FTP site. You will create four users that send requests for two files on a FTP site. Also, you will tell the users to run their tests twice. So, the total number of requests is (4 users) x (2 requests) x (repeat 2 times) = 16 FTP requests.
To construct the Test Plan, you will use the following elements: Thread Group, FTP Request, FTP Request Defaults, and View Results in Table.
7.1 Adding Users
The first step you want to do with every JMeter Test Plan is to add a Thread Group element. The Thread Group tells JMeter the number of users you want to simulate, how often the users should send requests, and the how many requests they should send.
Go ahead and add the Thread Group element by first selecting the Test Plan, clicking your right mouse button to get the Add menu, and then select Add → ThreadGroup.
You should now see the Thread Group element under Test Plan. If you do not see the element, then "expand" the Test Plan tree by clicking on the Test Plan element.
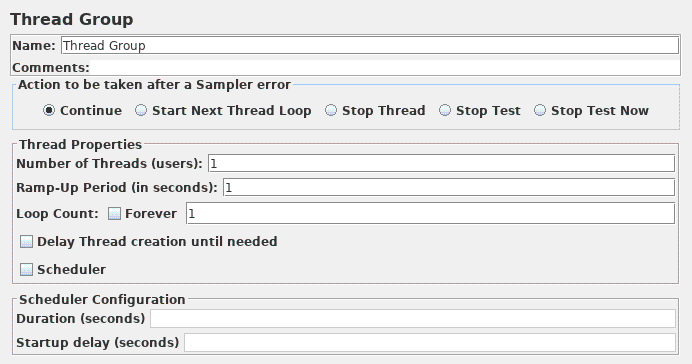
Next, you need to modify the default properties. Select the Thread Group element in the tree, if you have not already selected it. You should now see the Thread Group Control Panel in the right section of the JMeter window (see Figure 7.1 below)
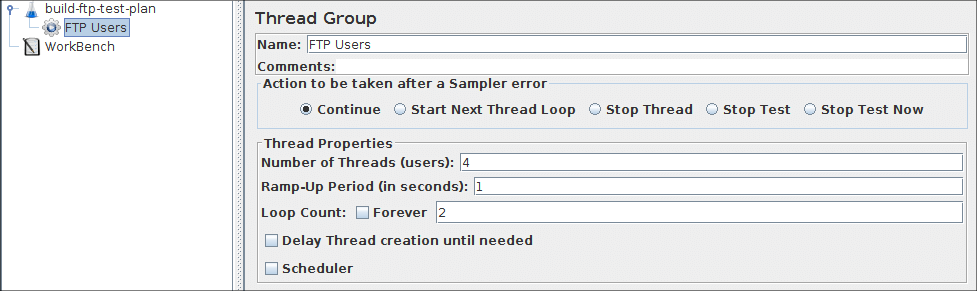
Start by providing a more descriptive name for our Thread Group. In the name field, enter 'FTP Users'.
Next, increase the number of users to 4.
In the next field, the Ramp-Up Period, leave the default value of 0 seconds. This property tells JMeter how long to delay between starting each user. For example, if you enter a Ramp-Up Period of 5 seconds, JMeter will finish starting all of your users by the end of the 5 seconds. So, if we have 5 users and a 5 second Ramp-Up Period, then the delay between starting users would be 1 second (5 users / 5 seconds = 1 user per second). If you set the value to 0, then JMeter will immediately start all of your users.
Finally, enter a value of 2 in the Loop Count field. This property tells JMeter how many times to repeat your test. To have JMeter repeatedly run your Test Plan, select the Forever checkbox.
See Figure 7.2 for the completed FTP Users Thread Group.
7.2 Adding Default FTP Request Properties
Now that we have defined our users, it is time define the tasks that they will be performing. In this section, you will specify the default settings for your FTP requests. And then, in section 7.3, you will add FTP Request elements which use some of the default settings you specified here.
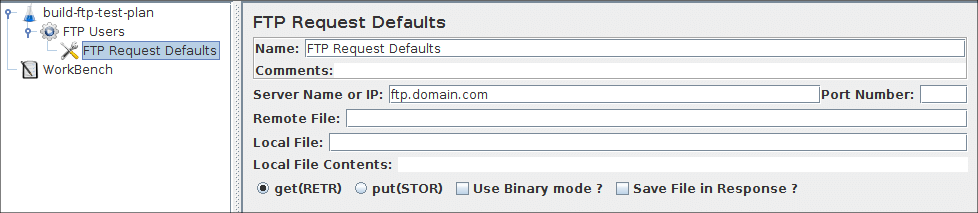
Begin by selecting the FTP Users element. Click your right mouse button to get the Add menu, and then select Add → Config Element → FTP Request Defaults. Then, select this new element to view its Control Panel (see Figure 7.3).
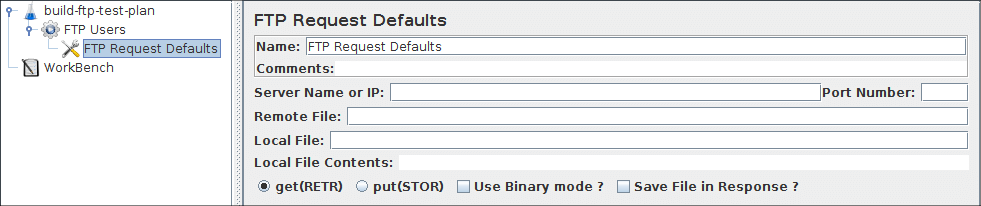
Like most JMeter elements, the FTP Request Defaults Control Panel has a name field that you can modify. In this example, leave this field with the default value.
Skip to the next field, which is the FTP Server's Server Name/IP. For the Test Plan that you are building, all FTP requests will be sent to the same FTP server, ftp.domain.com in this case. Enter this domain name into the field. This is the only field that we will specify a default, so leave the remaining fields with their default values.
See Figure 7.4 for the completed FTP Request Defaults element
7.3 Adding FTP Requests
In our Test Plan, we need to make two FTP requests.
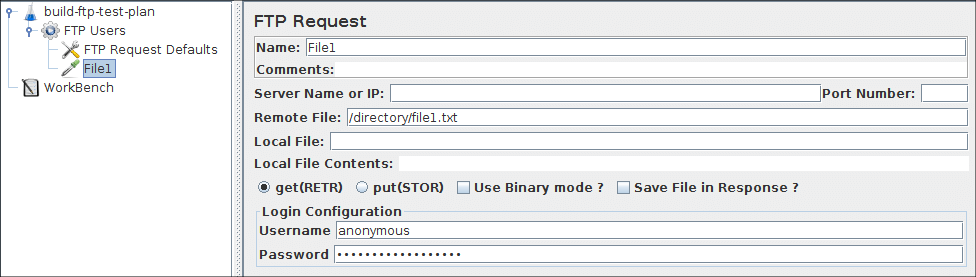
Start by adding the first FTP Request to the FTP Users element (Add → Sampler → FTP Request). Then, select the FTP Request element in the tree and edit the following properties (see Figure 7.5):
- Change the Name to "File1".
- Change the Remote File field to "/directory/file1.txt".
- Change the Username field to "anonymous".
- Change the Password field to "anonymous@test.com".
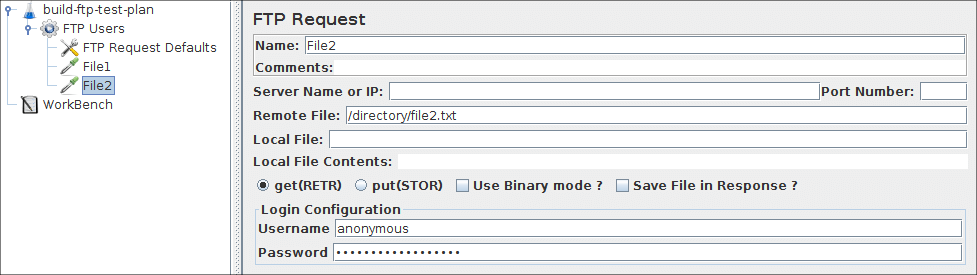
Next, add the second FTP Request and edit the following properties (see Figure 7.6:
- Change the Name to "File2".
- Change the Remote File field to "/directory/file2.txt".
- Change the Username field to "anonymous".
- Change the Password field to "anonymous@test.com".
7.4 Adding a Listener to View/Store the Test Results
The final element you need to add to your Test Plan is a Listener. This element is responsible for storing all of the results of your FTP requests in a file and presenting a visual model of the data.
Select the FTP Users element and add a View Results in Table listener (Add → Listener → View Results in Table).
Run your test and view the results.